Exploring the Mysteries of Substack #2: The Edit Page is Your Friend
Be not afraid.
Hi Newbies! Hi everyone! Seems like only yesterday…
Today we’re going to get to all the delicious stuff you can do on the edit page. (The page you see when you go into your Dashboard and hit ‘New Post’.) It’s where the action is. Your office. Your laboratory. If you’ve written online blogs before, much of it will be familiar. If you haven’t, no need to feel intimidated. It’ll all make sense after a while, and you’ll be on your way. But don’t forget to ask questions if anything’s fuzzy. We’ve been there. I promise we won’t smirk.
What’s it all about, Alfie?
First I need to tell you I’m no expert when it comes to the workings of Substack. I’ve been doing it for a while, but not for so long that I’ve forgotten how intimidating it can be at first. So the only advantage I can see in me being the one to guide you through the early stages is that I’m still early enough in the early stages to know what you’re going to need starting out. Think of it as Kindergarten. Once I get you through this, you’ll be graduating and moving on, probably to about where I am now.
But never mind. We have work to do.
See the tool bar at the top of the Edit page? The bar that doesn’t move as you scroll up? If it looks simple, that’s because it is. Everything you’ll need to produce a publishable post is up there.
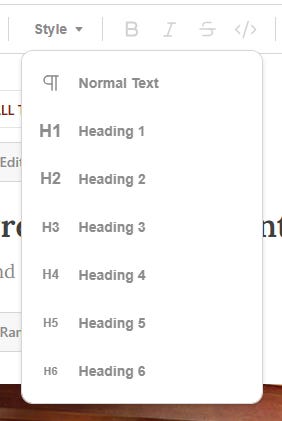
The Style tab lets you highlight or emphasize a word or a phrase by increasing the size of the font, giving it a ‘headline’ look.
Like this.
You can only use it in full paragraphs, and you do it by first highlighting the part you want to emphasize, then choosing the size by the heading number in the box. When you’re finished you can go back to ‘Normal Text’, which is this one. (I used Heading 3 for ‘Like This’, above.)
Next to the box you’ll find Bold, Italics, Strikethrough, and something called ‘Code’. (A total mystery to me but maybe not to you.)
Next to that you’ll find the toggles to add links, pictures, audio, and quotes. we’ll talk more about them next time, when we’re at the actual writing stage. (Do you know how to highlight? Do you know how to add a URL? No? Let me know in the comments and I’ll take you through it.)
Next, you’ll see the box that’ll help you make either bulleted or numbered lists. Do you need practice for this? Type out a sentence, highlight it, and click on either the bulleted or numbered box. Then hit ‘enter’. The next blank line will start with a bullet or number. (Because it knows from your first action that you’re going to start a list. Clever, huh?)
When you’ve finished with your list just hit enter again, click on the darkened Bullet or Number box in the toolbar, and you’ll be back at a regular paragraph.
sentence into list
next one
And we’re back.
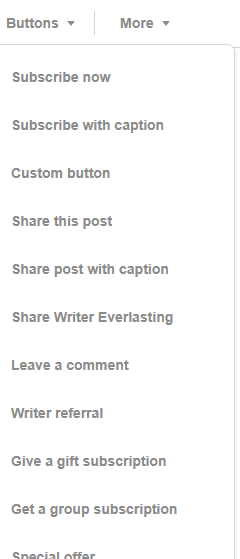
Now we’re at the Buttons tab. This is what it looks like when you click on it:
All of them, down to “Leave a comment”, will insert themselves into a new paragraph just by clicking on them. All except ‘Custom Button’. With this one you get to make it your own. I usually use mine to go to my Kofi page, where readers can leave tips, but there are all kinds of uses for it.
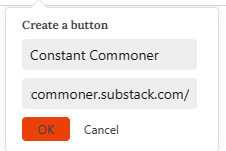
This is what it looks like when you open it. It does require a URL, so there are limits, but you could use it to direct to another post or section of your newsletter simply by grabbing the URL at the top of your post or section page and inserting it. Or, if you have a second newsletter, like I do, it could go there. Any place that has a URL.
When I click OK, it looks like this on the page:
(The buttons after “Leave a comment” are optional depending on which services you’ve signed on to. You can ignore them for now.)
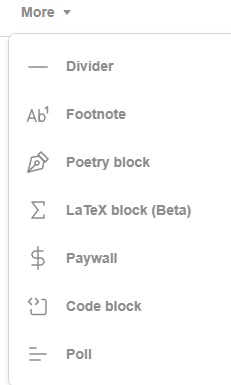
The More tab looks like this when you open it:
I’ve only ever used Divider and Footnote (Footnote is kind of fun. Just click on it at the end of the sentence you want to, um, footnote, and it’ll take you to the bottom of the page, where you can insert that part you didn’t want to add above but needed to put somewhere.) You may find uses for the others. Again, I’d suggest playing around with them to see what they can do. Don’t be afraid to touch things around here. Nothing is breakable. It can all be put back together.
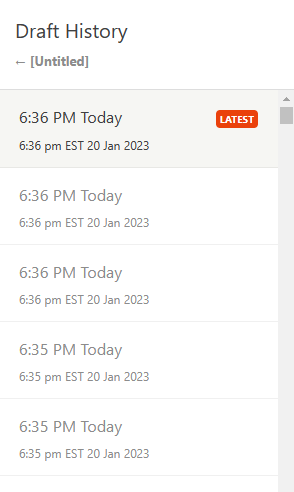
Which brings me to Draft history at lower left. This is your lifesaver, your fire extinguisher, your friend in need. Say you’ve written your post and something goes wrong. You’ve somehow deleted the latest version accidentally or you’ve taken something out that you wish you could put back in. Draft History has it all stored for you. Every single revision, because it has been saving your work automatically when you weren’t looking. You just have to click on an earlier version and it’ll appear on the page, ready for you to either grab something you wanted out of it or to make it a current version.
This is what it looks like:
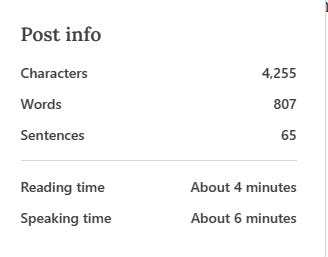
The little round button next to it is another treasure trove. It’s your Post info:
This tells me where I am with my post. I try to keep my newsletter posts short—500 to 800 words, about the length of a newspaper column—because I was a columnist back in the day, and because I think readers’ inboxes are full enough.
As I’m writing I’m checking this and it tells me if I’m going to need to tighten things, or if I can go on for a while. It’s good to know the reading time, too. Unless a blog post is informational or absolutely riveting, I’d say five minutes is a merciful length.
Please note: Blog length is as variable as you want it to be. Pay no attention to what I’ve said above if your true love is long form or long, long form or even mile-long form. (Yes, I’ve heard grumblings.) It’s the quality of your writing that matters. If you write something someone will want to spend a long time reading, they’ll do it and beg for more. But if you’re new to blogging as well as to Substack, it might be better to think short at first. The happy task will feel far less intimidating if you know up front you’re not going to be wallowing in that piece for what seems like forever.
So now you’re ready to start your first real post. We’ll go through that next. In the meantime, don’t be timid about playing with your page. It’s going to be YOUR page, after all. Own it!
Now let’s move on to Lesson #3.
And here’s a link to Lesson #1, in case you missed something:




I'm becoming less and less scared of substanck!
I accidentally created a second publication in my name (first one I decided to call Relationship Rescue) and I want to delete it. Is that possible?
Thank you - I didn't know about the Post Info button. I have so much more to learn about Substack. I look forward to reading more acquainted with its intricacies.